SOC Automation - Configuration of Wazuh and TheHive
In this blog post, i’ll walk through setting up a home lab for SOC (Security Operations Center) automation. This part focuses on configuring and getting both Hive (Incident Response Platform) and Wazuh (SIEM and XDR) servers up and running.
Important Note
For this setup, I kept all configurations to
localhostto simplify communication between the services. Additionally, I set the network mode in my Oracle VirtualBox VMs to Bridged Adapter so that they could get assigned an IP on the same subnet. This allowed me to run both Wazuh and TheHive on the same server without cloud deployment, and I configured UFW on the Linux server to allow communication from the Windows endpoint.
UFW Configuration
I opened the necessary ports on the Linux server hosting Wazuh and TheHive so that they can communicate with the Windows endpoint. Here’s how I allowed traffic from my Windows host to the Linux server:
1
2
3
4
5
6
7
8
9
10
11
12
13
14
# Allow access to Wazuh dashboard (port 443)
sudo ufw allow from 170.10.100.0/24 to any port 443 proto tcp

# Allow access to The Hive dashboard (port 9000)
sudo ufw allow from 170.10.100.0/24 to any port 9000 proto tcp

# Allow access to Wazuh manager (port 1514)
sudo ufw allow from 170.10.100.0/24 to any port 1514 proto tcp

# Allow access to Wazuh API (port 1515)
sudo ufw allow from 170.10.100.0/24 to any port 1515 proto tcp

# Allow Wazuh agent registration (port 50000)
sudo ufw allow from 170.10.100.0/24 to any port 50000 proto tcp
Configuring Hive Server
Cassandra Configuration
Hive relies on Cassandra as its database system. Here’s a step-by-step process for configuring it:
- Access Cassandra Configuration: Open Cassandra’s configuration file by typing:
1
 nano /etc/cassandra/cassandra.yaml
Edit Cluster Name: Modify the cluster name from “Test Cluster” to something relevant, like “soc-automation”.
Set Listen and RPC Addresses: Update the listen and RPC addresses with the public IP of your Hive instance (kept it as local host).
Update Seed Address: Replace the seed address from the default
127.0.0.1to the public IP of Hive (kept it as is).- Restart Cassandra: Use the following commands to stop and start Cassandra:
1
2
 sudo systemctl stop cassandra
 sudo systemctl start cassandra
Elasticsearch Configuration
Elasticsearch manages data indexing for Hive:
- Edit Elasticsearch Config: Open the Elasticsearch configuration file:
1
 nano /etc/elasticsearch/elasticsearch.yml
Modify Cluster Name: Change the cluster name to “soc-automation” and adjust network settings to reflect the public IP. (kept it as localhost)
- Start Elasticsearch: Start and enable the service with:
1
2
 sudo systemctl start elasticsearch
 sudo systemctl enable elasticsearch
Setting Up The Hive
Before configuring The Hive:
- Ensure Directory Permissions: Update the file permissions for The Hive’s working directory:
1
 sudo chown -R hive:hive /opt/thehive
Edit Application Configuration: Open the Hive configuration file and update the database, index, and storage settings with your public IP (kept it as local host) and cluster name.
- Start The Hive: Finally, start The Hive and enable the service:
1
2
 sudo systemctl start thehive
 sudo systemctl enable thehive
Configuring Wazuh Server
Accessing the Wazuh Dashboard
To begin Wazuh’s configuration:
- Login to the Dashboard: Use the administrative credentials from part 2 to access Wazuh.
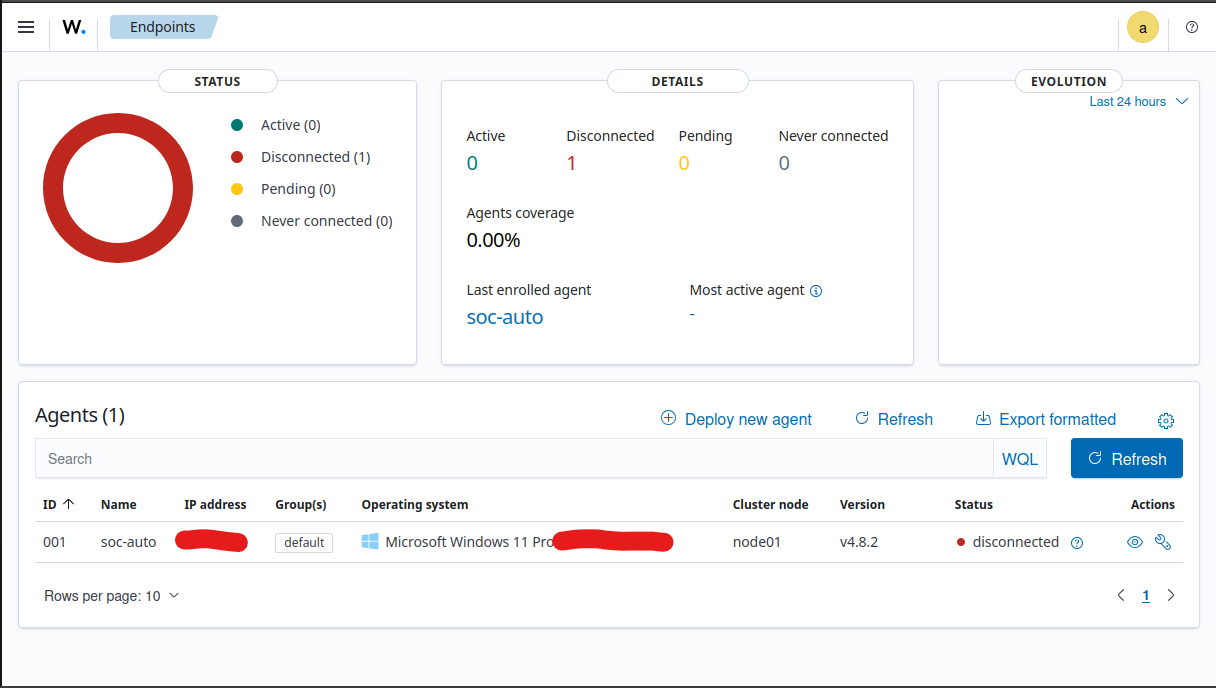
Adding a Windows Agent
To connect your Windows endpoint to Wazuh:
Select Windows Agent: In the dashboard, click on “Add agent” and select Windows.
Enter Server Details: Enter the Wazuh server’s public IP (kept it as localhost) and assign a name to the agent (e.g., soc-automation).
Copy and Run Command: Copy the generated command and run it on your Windows machine in an administrative PowerShell window.
End Result
Next Steps
Now that both Hive and Wazuh are up and running, the next step is to generate security events and configure alerts in Wazuh.
This post is part of Jad’s Cybersecurity Blog.