Docker and Portainer Setup
In this blog post, I’ll walk through the process of setting up Docker and Portainer to efficiently manage containerized applications in my Home Lab.
Setting Up Docker and Portainer
To streamline the deployment and management of containerized applications, I leveraged Docker and Portainer. Docker provides a robust platform for containerization, while Portainer offers an intuitive web interface for managing Docker environments. However, in future projects , I will not always be using Portainer.
Installing Docker
First, I installed Docker on a new kali VM (under VLAN 2424) using the following commands:
1
2
3
4
sudo apt update
sudo apt install docker.io -y
sudo systemctl start docker
sudo systemctl enable docker
To verify Docker installation:
1
docker --version
Deploying Portainer
Portainer simplifies Docker management with an easy-to-use web-based interface. I deployed Portainer using the following command:
1
2
3
4
5
6
docker run -d -p 9000:9000 \
  --name portainer \
  --restart always \
  -v /var/run/docker.sock:/var/run/docker.sock \
  -v portainer_data:/data \
  portainer/portainer-ce
After successful deployment, I accessed the Portainer web interface at http://192.168.60.2:9443. The setup process included creating an admin account and connecting Portainer to the local Docker environment.
Configuring Portainer for VLAN 2424
After logging into Portainer, I proceeded to configure the network to ensure that containers could operate within VLAN 2424.
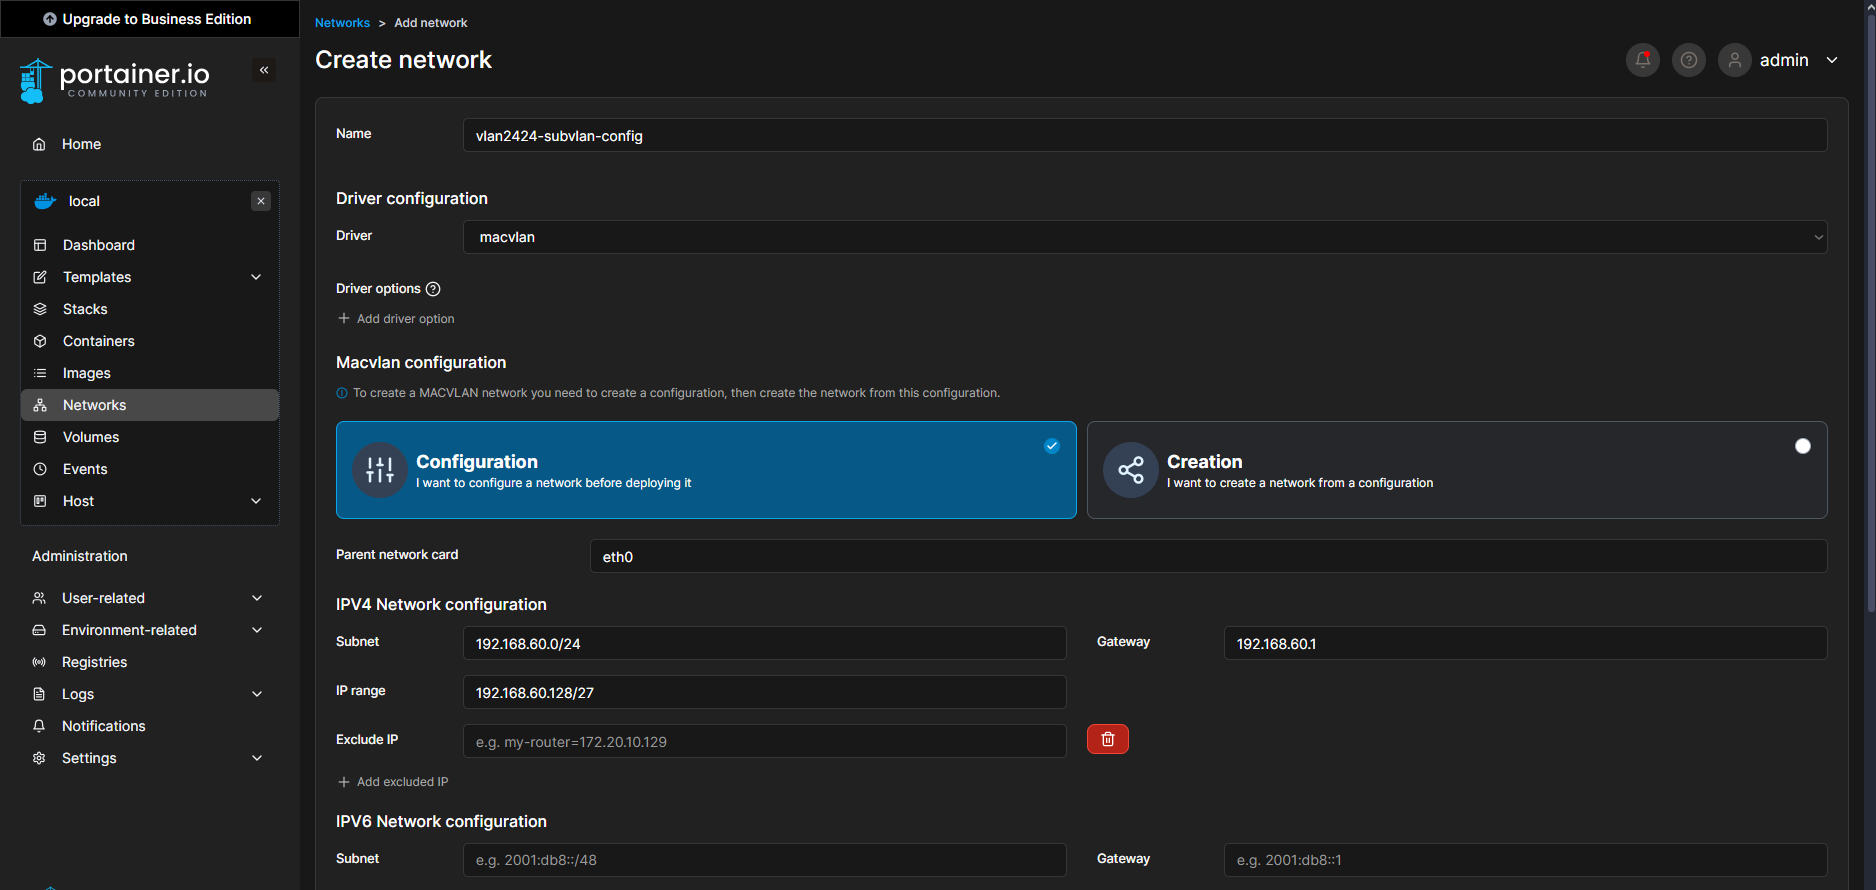
Step 1: Creating the Initial Network Configuration
First, I navigated to the Networks tab located in the right-side menu bar and added a new network using the following configuration:
Subnet: I opted for a
/27subnet range, as I do not anticipate running more than 30 containers simultaneously.
Step 2: Creating the Network
Once the initial configuration was set up, I proceeded to create a new network using the previously defined configuration.
Since the network type selected was Macvlan, the process required creating the configuration first and then using it to establish the actual network.
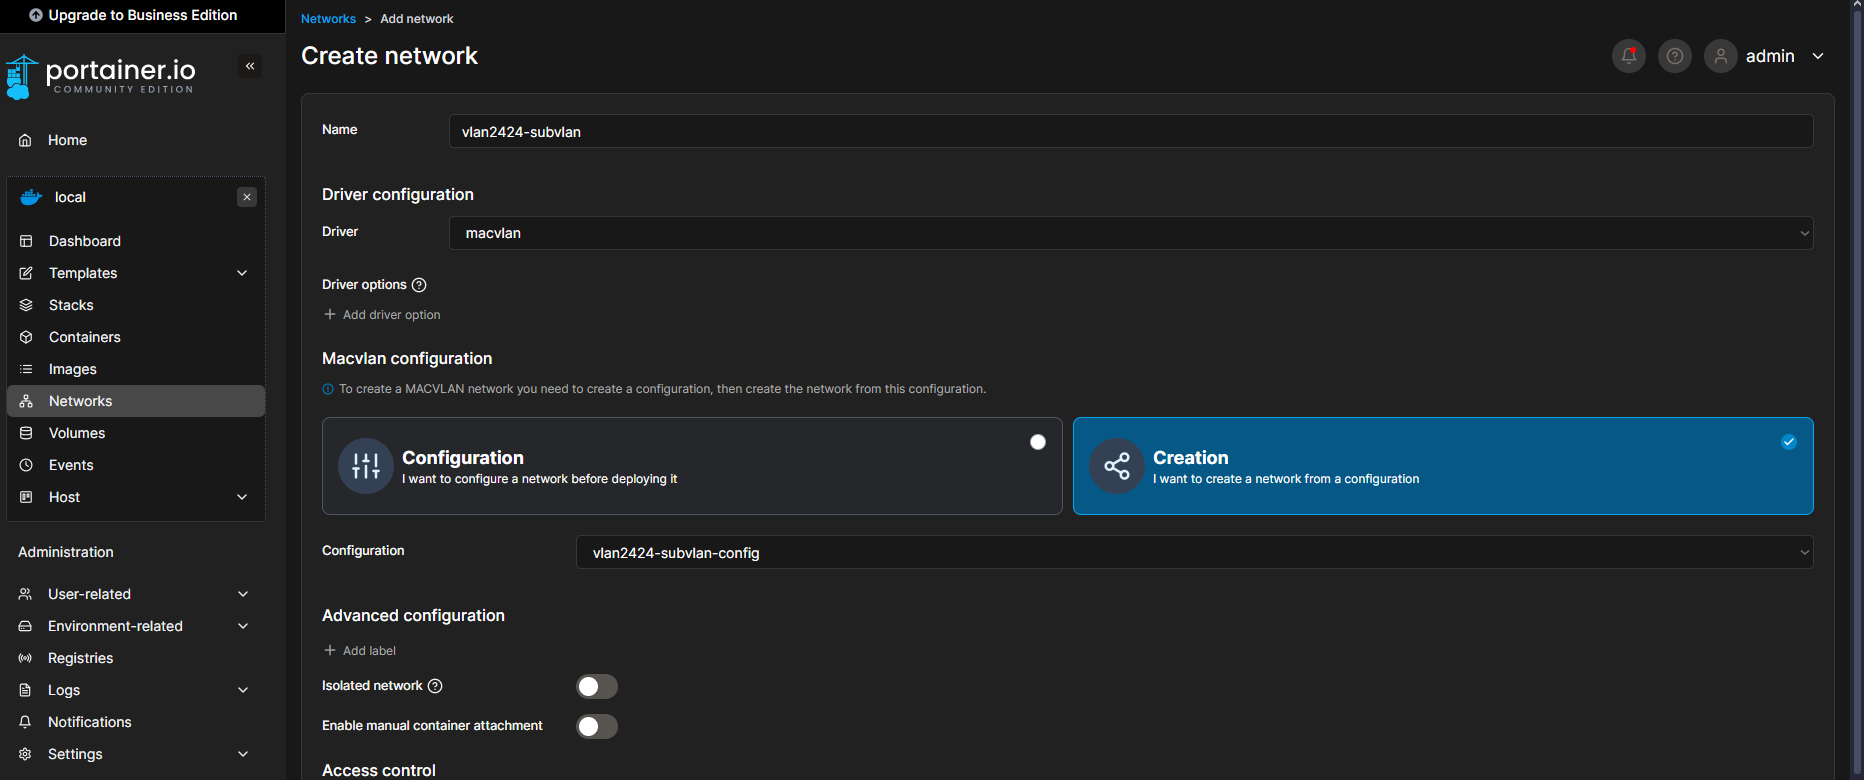
By following these steps, I successfully integrated VLAN 2424 into my Portainer setup, allowing my containers to communicate efficiently within the designated VLAN.
Benefits of Using Docker and Portainer
By integrating Docker with Portainer, I gained several advantages:
- Ease of Management: A centralized interface to control all running containers.
- Rapid Deployment: Quickly deploying, and managing containerized applications.
- Resource Monitoring: Real-time insights into CPU, memory, and disk usage.
- Enhanced Security: Isolated environments for running vulnerable applications safely.
Conclusion
Setting up Docker and Portainer provided a seamless way to manage containerized environments. This setup allows for efficient deployment, monitoring, and management of applications, making it an essential component for ease of setup of cybersecurity projects.
This post is part of Jad’s Cybersecurity Blog.