Deploying Wazuh, Wazuh Agents and Nessus
In this blog post, I’ll be going over deploying Wazuh, a Security Information and Event Management (SIEM) and Extended Detection and Response (XDR) tool, along with Nessus, a vulnerability scanner. This builds upon my previous work of setting up a pfSense firewall, Linux server, Docker environment.
The goal was to strengthen log monitoring, threat detection, and vulnerability management in my lab through step-by-step installation and configuration of these essential security tools.
1. Deploying Wazuh (SIEM/XDR Tool)
1.1 Setting Up the Wazuh Virtual Machine (VM)
I deployed the Wazuh instance using a new Ubuntu virtual machine with the following specifications:
- Name: Wazuh-SVC
- OS: Kali Linux
- Storage: 160GB (for log storage)
- CPUs: 4 vCPUs
- RAM: 6GB
- Network: VLAN 2020,
1.2 Installation and Configuration Steps
Initial Setup:
1
sudo apt update && sudo apt upgrade -y
- Updated the firewall to allow necessary traffic.
Installing Wazuh:
1
curl -sO https://packages.wazuh.com/4.x/wazuh-install.sh && bash wazuh-install.sh
After installation, I accessed the Wazuh web interface via https://192.168.20.11, retrieved the auto-generated password, and successfully logged in to confirm the setup.
1.3 Adding Security Agents to Wazuh
To monitor the different components in my lab, I deployed Wazuh agents across multiple machines:
1.3.1 Kali Linux Agent
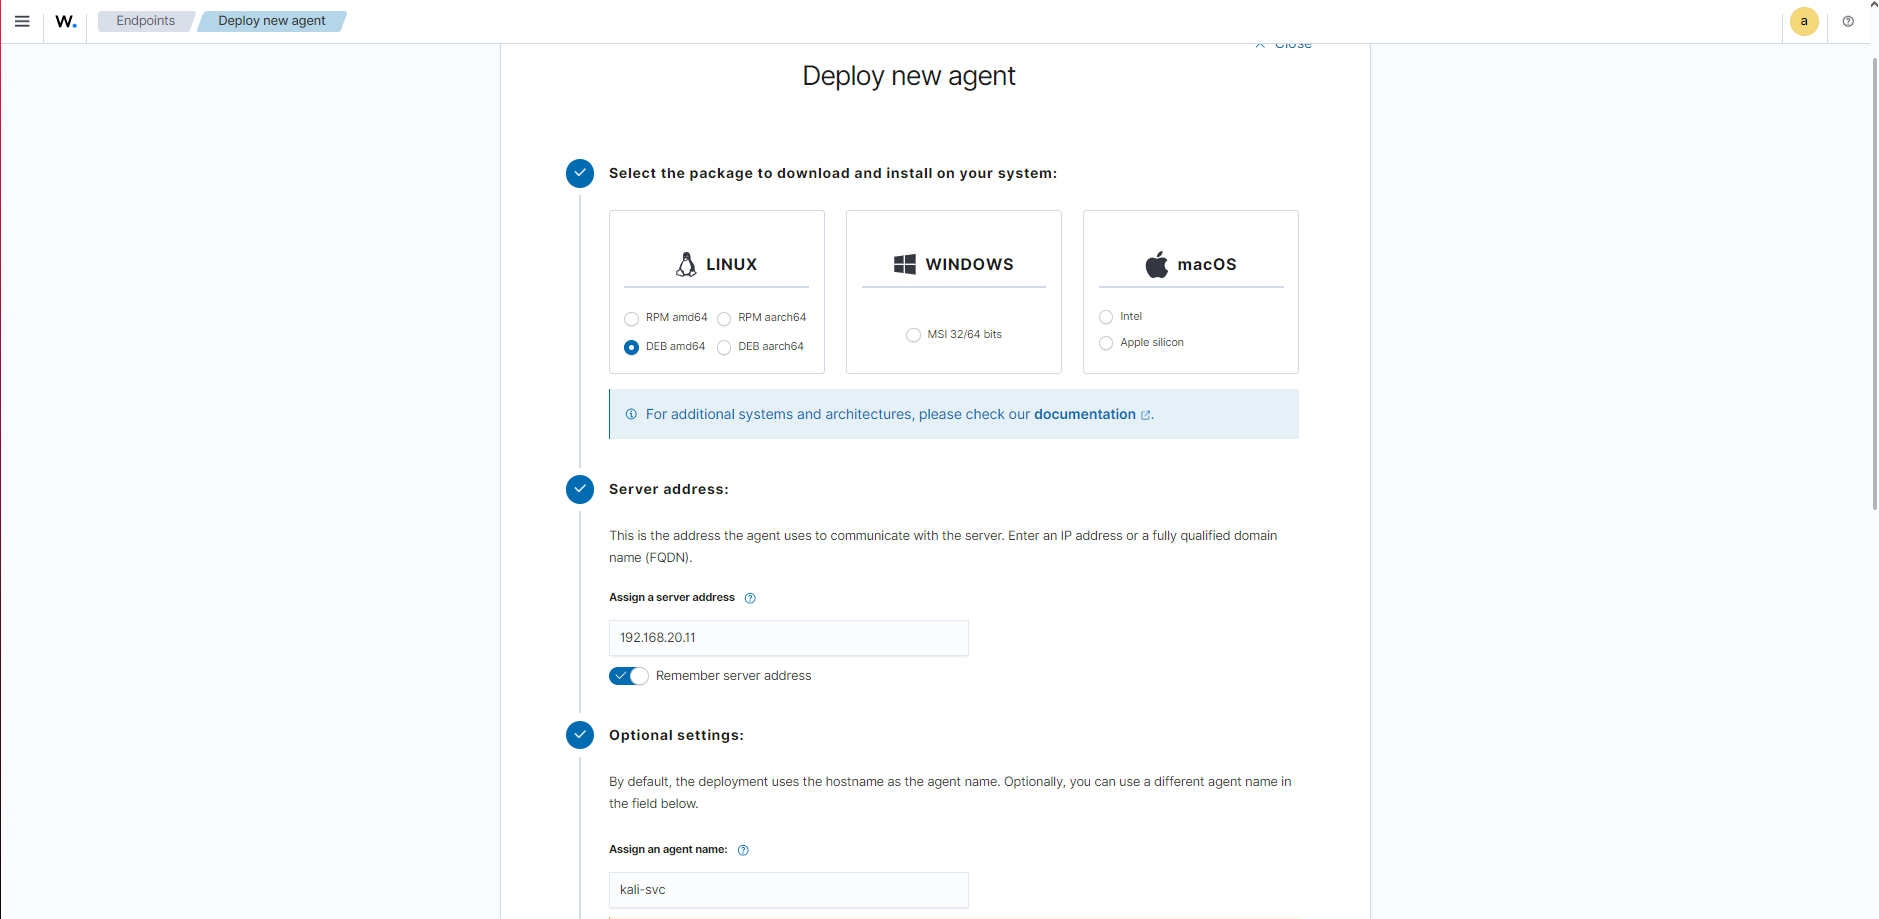
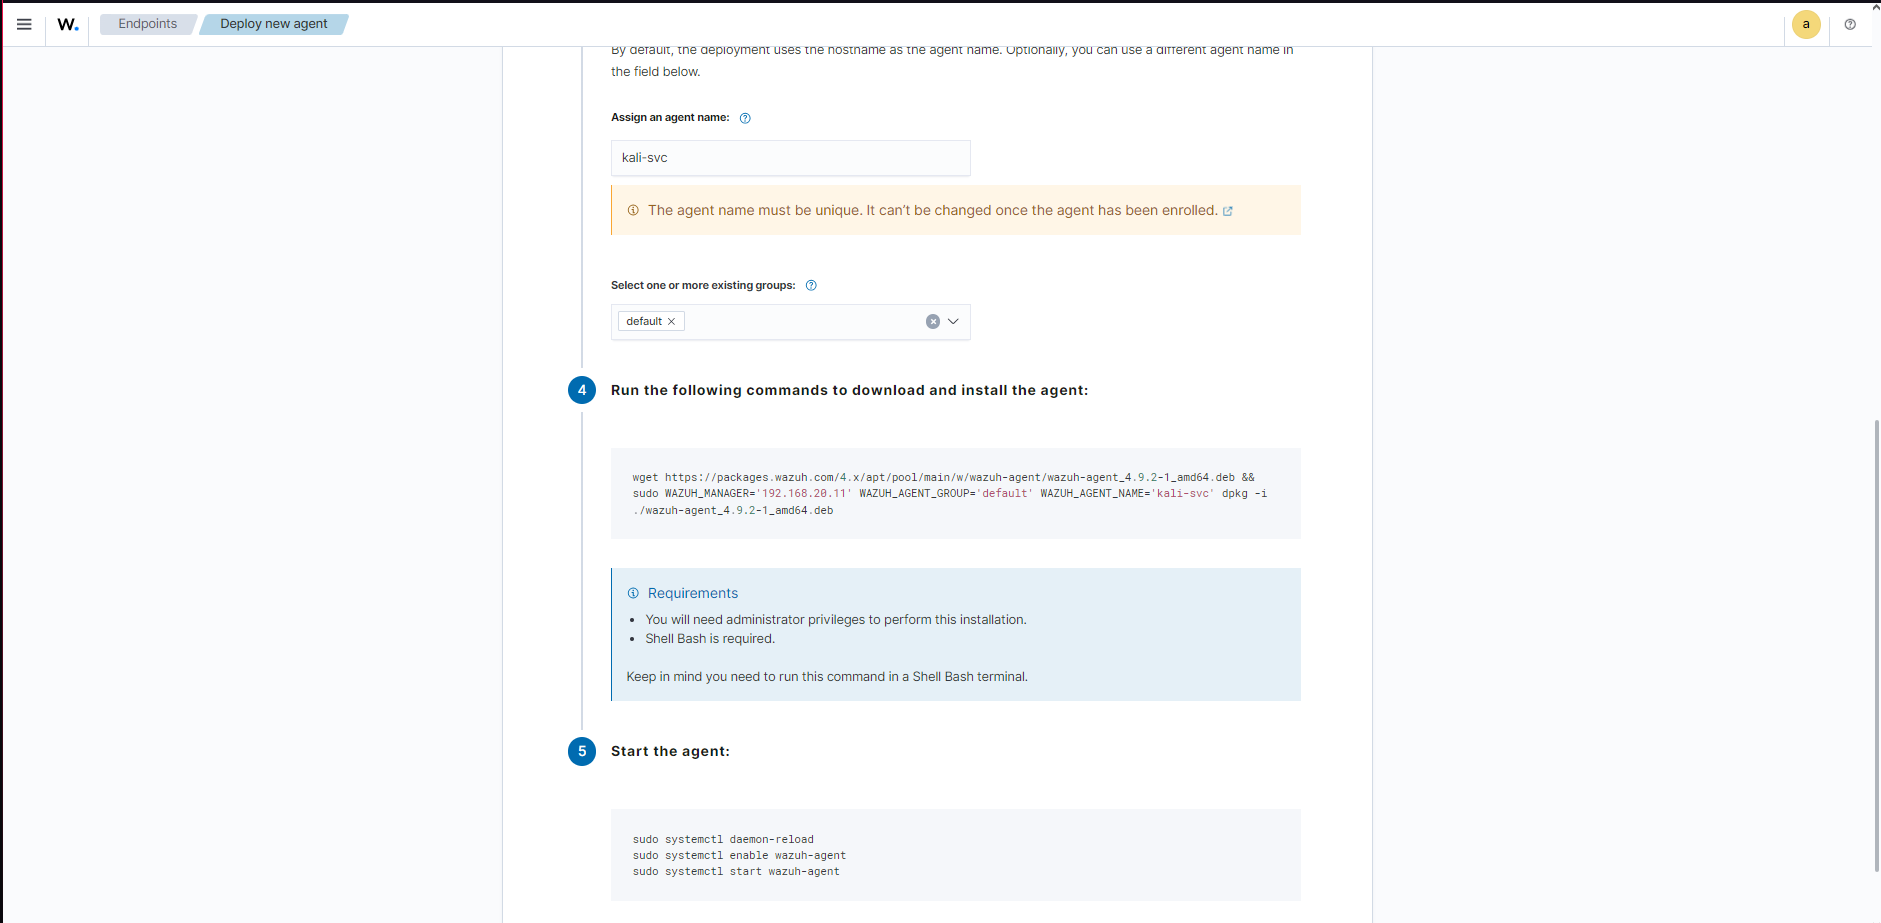
- Installed the Wazuh agent on Kali Linux following the instructions on the Wazuh Web Interface and running the command on the kali host:
1.3.2 Docker Server Agent
1. Installing the Wazuh Agent on the Docker Host
The first step is to install the Wazuh agent on the host machine that runs Docker. Follow these steps:
Step 1: Download and Install the Agent
On the Docker host, execute the following commands to install the Wazuh agent:
1
2
curl -sO https://packages.wazuh.com/4.x/wazuh-install.sh
sudo bash wazuh-install.sh --agent
After installation, the agent service should be started automatically.
Step 2: Configure the Agent
Modify the Wazuh agent configuration file located at /var/ossec/etc/ossec.conf to include the Wazuh manager’s IP:
1
2
3
4
5
6
7
8
<client>
  <server>
    <address>192.168.20.11</address>
    <port>1514</port>
    [...]
  </server>
  [...]
</client>
Save the file and restart the agent:
1
sudo systemctl restart wazuh-agent
2. Enabling Docker Monitoring
Wazuh can monitor Docker containers by collecting logs and security events. To enable Docker monitoring:
Enable Docker Module
In the Wazuh agent configuration (/var/ossec/etc/ossec.conf), add the following module:
1
2
3
4
5
6
<ossec_config>
  <wodle name="docker-listener">
    <disabled>no</disabled>
  </wodle>
  [...]
</ossec_config>
Restart the Docker service to apply changes:
1
sudo systemctl restart docker
1.3.3 pfSense Firewall Agent
- Enable SSH before connecting to firewall.
- Enable FreeBSD to allow downloading the Wazuh agent.
- Enable the firewall logs (syslog already in place).
- In Wazuh, create a group and enable rules.
Enable FreeBSD to Pull the Wazuh Agent
By default, FreeBSD package repos are disabled on pfSense firewalls. Follow the steps below to enable them for our lab.
SSH to the firewall and navigate to the following directory:
1
cd /usr/local/etc/pkg/repos/
Edit pfsense.conf file:
1
vi pfsense.conf
Set the following content:
1
FreeBSD: { enabled: yes }
Edit FreeBSD.conf file:
1
vi FreeBSD.conf
Set the following content:
1
FreeBSD: { enabled: yes }
Install Wazuh Agent
Update the package cache:
1
pkg update
Search for the Wazuh agent:
1
pkg search wazuh-agent
Install the Wazuh firewall agent:
1
pkg install wazuh-agent-4.7.2
Start Wazuh Agent
Enter the following command:
1
cp /etc/localtime /var/ossec/etc
Then edit the ossec.conf file:
1
vi ossec.conf
Add the following configuration:
1
2
3
<server>
  <address>192.168.20.11</address>
</server>
Set the agent to enabled by entering:
1
sysrc wazuh_agent_enable="YES"
Create a symbolic link:
1
ln -s /usr/local/etc/rc.d/wazuh-agent /usr/local/etc/rc.d/wazuh-agent.sh
Start the agent:
1
service wazuh-agent start
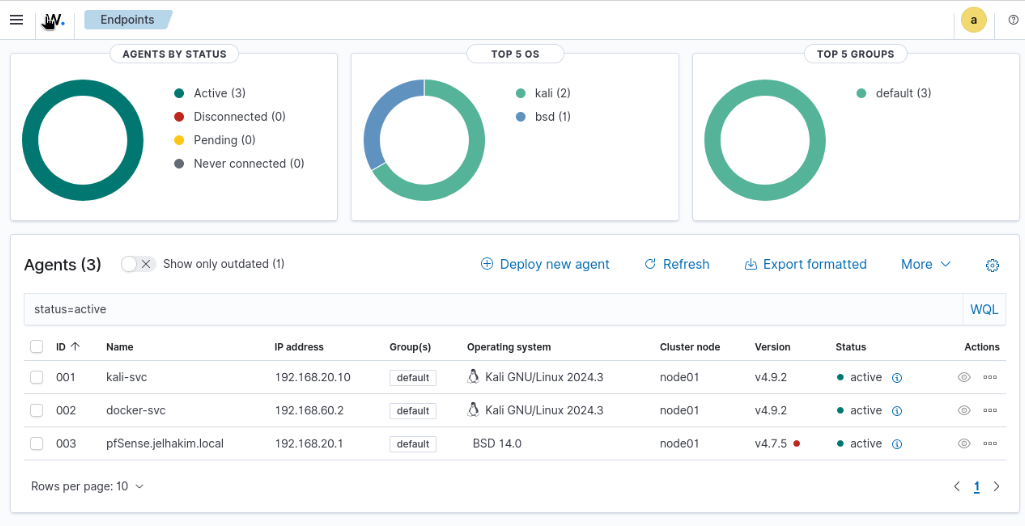
** Dashboard After Agent Deployments **:
2. Deploying Nessus (Vulnerability Scanner)
2.1 Setting Up the Nessus Virtual Machine (VM)
I created a new VM dedicated to Nessus vulnerability scanning with the following specifications:
- VM ID: 206
- Name: Prod-Nessus
- OS: Ubuntu 20.04 LTS
- Storage: 40GB
- CPUs: 4 vCPUs
- RAM: 4GB (4096 MB)
- Network: VLAN 1, static IP 10.1.1.152
- DNS: pfSense and Google DNS
2.2 Installation Steps
Downloading Nessus:
1
wget https://www.tenable.com/downloads/api/v1/public/pages/nessus/downloads/14084/download?i_agree_to_tenable_license_agreement=true
After installation, I started the Nessus service and accessed it via https://192.168.20.12:8834. I registered for a free license and entered the activation code received via email.
3. Achievements and Next Steps
Key Achievements:
- Installed and configured Wazuh with agents on multiple machines.
- Successfully installed Nessus and performed test vulnerability scans.
Future Plans:
- Explore Wazuh’s advanced features, such as custom rule creation and alert tuning.
- Schedule automated Nessus scans for critical infrastructure components.
- Integrate with tools like Elastic Stack and Splunk.
This post is part of Jad’s Cybersecurity Blog.